This is a guide to implementing a honeypot in the WordPress content management system. We are going to learn honeypots in WordPress! But before we dive into the content, let’s see what a honeypot is and how it can help us maximize the security of the WordPress website.
Suppose some mice live in your house! So, what is your first solution to get rid of them? You may use a mouse trap with some delicious food so the rat will fall into the trap. This is exactly the mechanism that the honeypot uses to prevent the spam robot’s attacks.
This is so wise. Honeypot adds an extra field to the WordPress website. Ordinary site users cannot see this field. But Malicious bots have a different approach! They navigate through the website source, and since they think that a hidden field (that is actually not hidden for them) should be filled by data, they fall into the trap.
So, this is the idea: we deliberately make a security hole to make them believe they are making damage. By using a honeypot, WordPress site security will highly increase significantly. Most of the websites that use this technique do not need to use a captcha. However, you can use that, too. Using a captcha has another benefit for your website. By using a captcha, touring tests can be run on your website, and this is a way to distinguish humans from robots.
How to run Honeypot on a WordPress website
There are mainly two ways to implement a honeypot on your site. High interactions honeypot and Low interactions honeypot. Choosing your way depends on how professional you are and the goal you want to approach. There is a high-risk way to implement this for professionals (High interactions honeypot) and also a way with no risk (Low interactions honeypot) for beginners.
Note: High-interaction honeypots should only be used by the network and security specialists.
Running High interactions honeypots (WordPress honeypot GitHub)
wpexpelor does not recommend using this method on a website with sensitive data. note that you shouldn’t use the method directly on your website. You need to implement that in a simulated area. As we said, this method should only be used by network experts. Otherwise, this may end in serious problems and server problems.
To configure this type of honeypot in WordPress you can use developed tools like HoneyPress. Tools and guidance are explained on GitHub.
https://github.com/cmllr/honeypress
Running low interactions honeypots on WordPress
The good news is that most of the WordPress security plugins provide you with a honeypot. Using this method has low risks, and it is easy to run. As the risk is low, we can gather less data from how Malicious bots work, but even with this condition, it is recommended to use a honeypot on WordPress.
10 Honeypot Anti-Spam Plugins you need to know!
Here are some of the most well-known plugins:
. All In One WP Security
. Antispam Bee
. Akismet Anti-Spam: Spam Protection
. All-In-One Security (AIOS)
. Spam protection, AntiSpam, FireWall by CleanTalk
. iThemes Security
. Titan Anti-spam & Security
. Wordfence
. Blackhole for Bad Bots
. Sucuri
Explaining Honeypot function with an example
Let’s explain the honeypot function with an example. Suppose you have an online shop. We aim to use a mouse trap! Here is the procedure:
1. We make a security hole in the database that seems to present free sell coupons.
2. Malicious bot starts to act.
3. We trace the bot, and the honeypot records everything (IP addresses, browser data…, etc.).
Based on the data, specialists can enhance the website security
Running Hoyepot on contact form 7 plugin
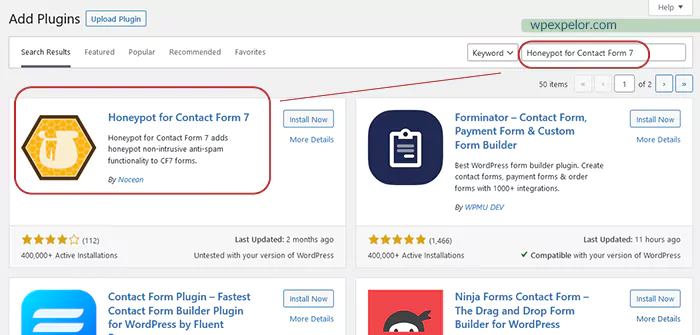
You can easily run the honeypot on contact form 7 by using the right plugin. To do so, you need to install Honeypot for Contact Form 7. It is free, and you can just use the WordPress repository.
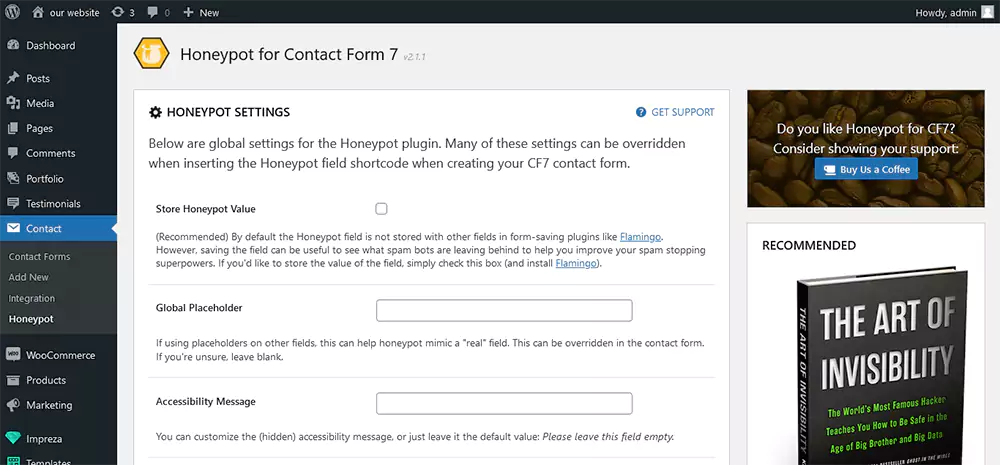
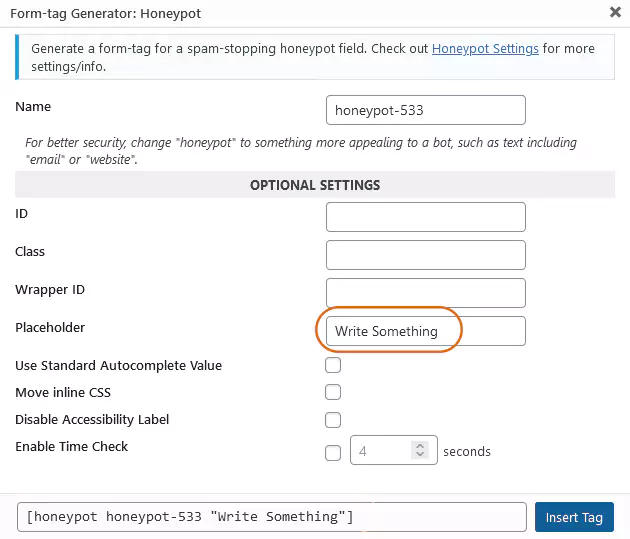
Search the name “Honeypot for Contact Form 7” and there it is. Install and activate the plugin. You can also change the default options based on your desire. But usually, there is no need to do so. Enter the “form” part, and then you can change the fields that you need. You can choose any name that you want, and the placeholder could also be a field or let it be with no further change.
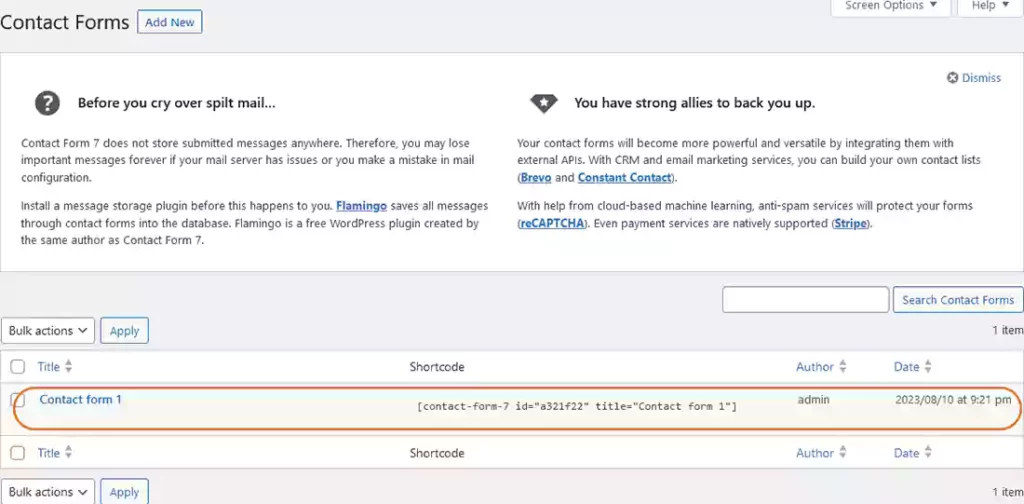
and then here is the contact form details:
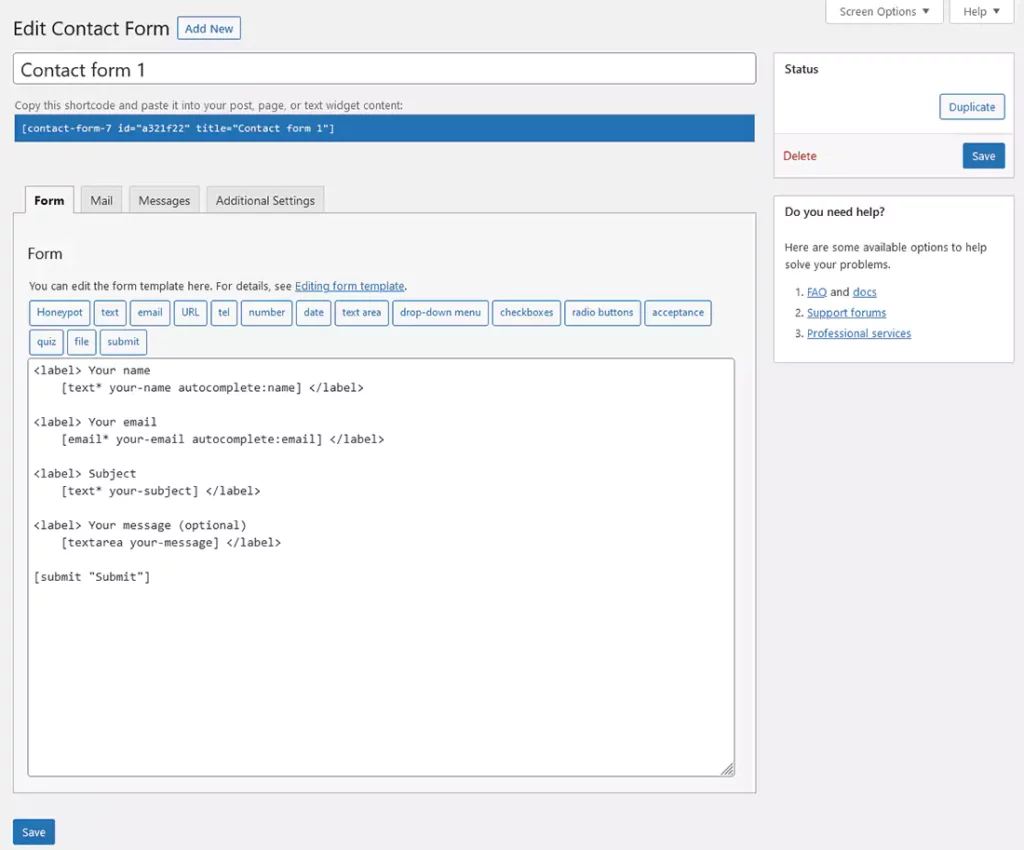
For example, you can fill it out by writing something and then save your form.
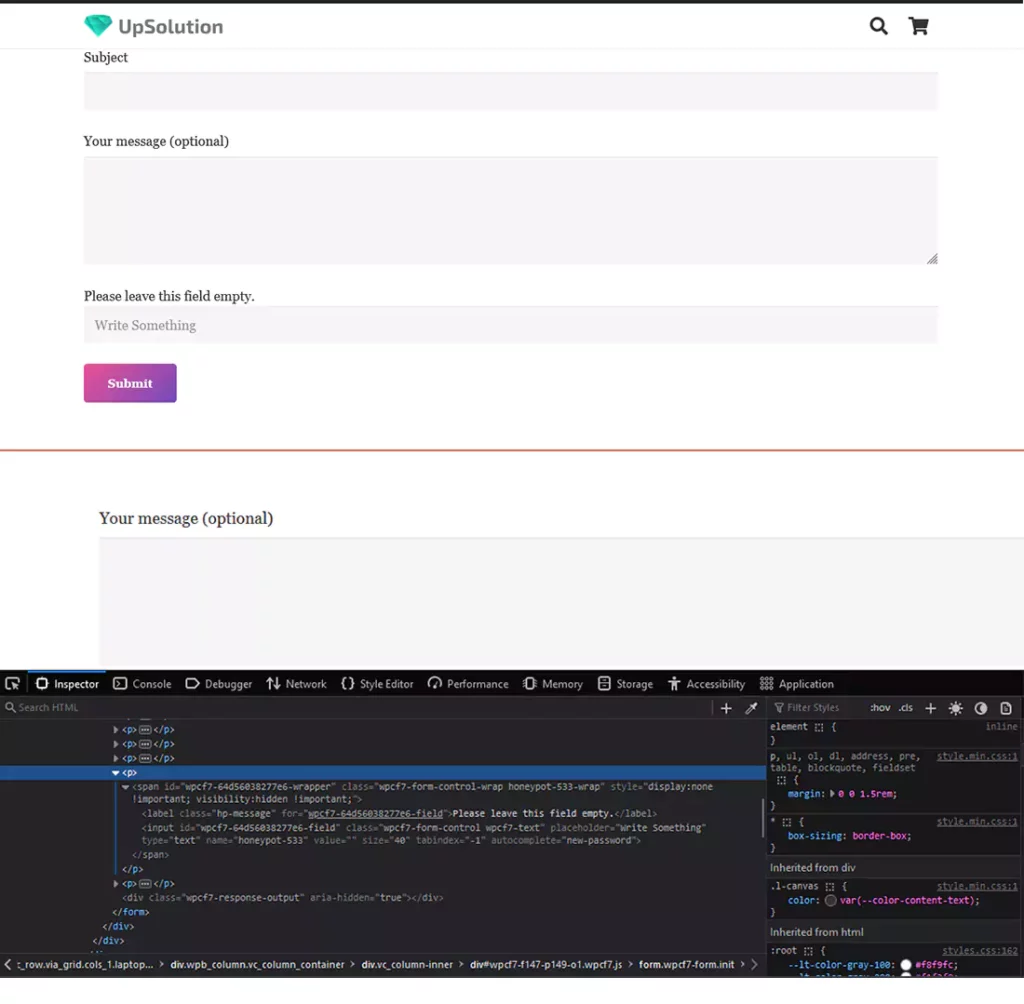
You can use the form on a page or post in WordPress. Now it is the time to take a look at your source code! You can easily see the honeypot. This field can not be noticed by ordinary people who visit your site. But harmful bots will detect it, and it is a nice trap!
Running Honeypot on WordPress form builders
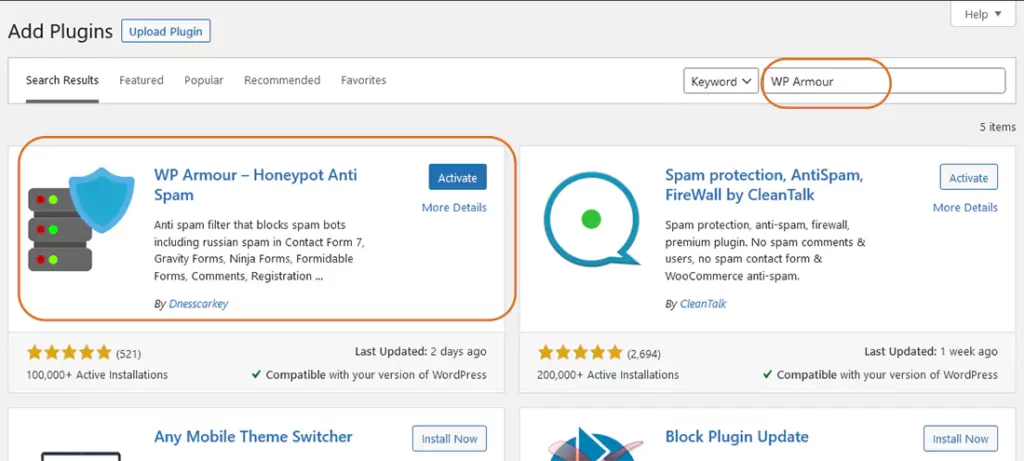
WP Armour is a very handy plugin that you can use to activate Honeypot on most WordPress form builders. The plugin has a free version that can be used with these plugins:
1. Contact Form 7
2. Gravity Forms
3. WPForms
4. Formidable Forms
5. Caldera Forms
6. Toolset Forms
7. Elementor Forms
8. Fluent Forms
9. Divi Theme Contact Form
This plugin can also add a honeypot to the comments part and register form. It is recommended to use the plugin because it is really easy to use. From the WordPress repository, search the name, install it, and then activate it! That’s all you need to do. The plugin automatically will add a honeypot to your forms.
Conclusion
In this article from wpexpelor, we discussed honeypot, and we learned how to use that in WordPress. Honeypot will increase your website security level. It will save your website from harmful spam bots. But is it all you need to secure a website? Definitely NO! A honeypot is just one of the items that you have to keep in mind to use. Besides, you need to use firewalls, restrict access levels, change login addresses, and other security tricks that we’ll soon publish new content about!
